Keepsake Treasure Box Makeover

IMG_0727These days, everyone saves things from their relationships. Whether its movie tickets or pictures, there’s always some Pinterest idea for your keepsakes.

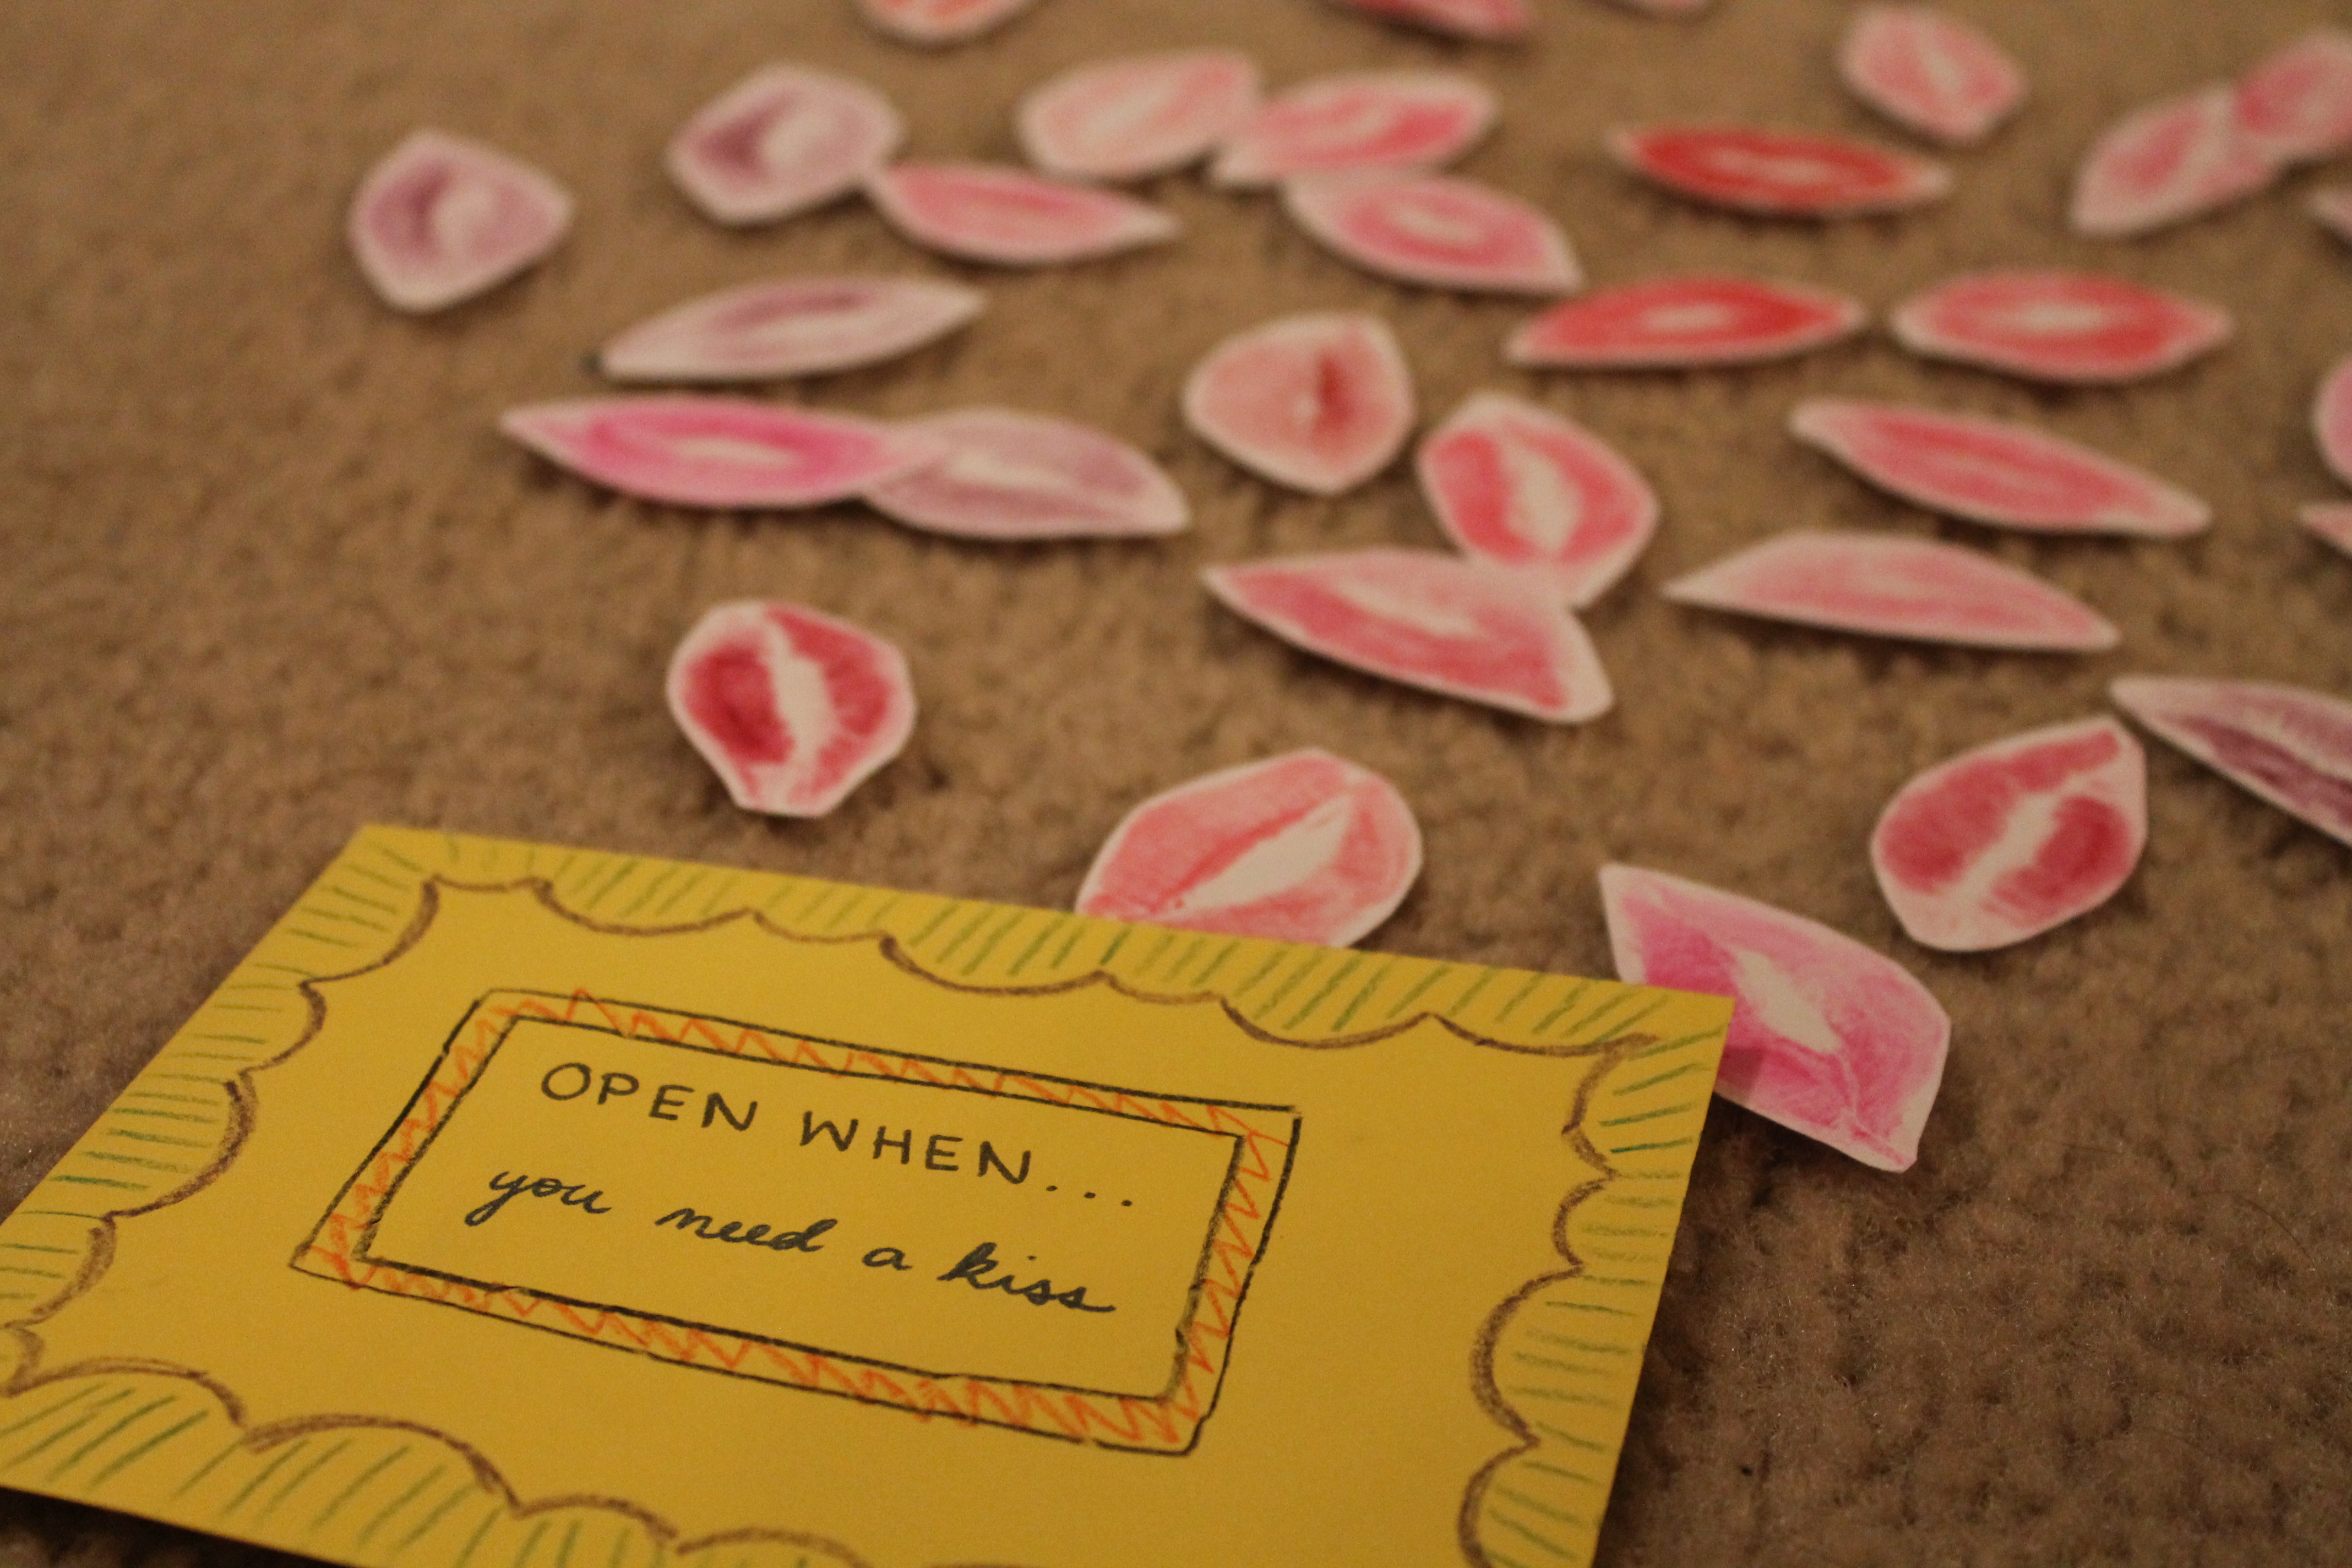
Personally, I don’t feel the need to make anything out of my tickets or other trinkets. I like being able to take them out and hold them. Particularly the letters Zac has written me throughout the years. Since he has been to several trainings that don’t allow cell phones, we have become very close friends with the US Postal Service. Those letters are one of my most prized possessions. So I have always just kept those things in a card board box under my bed, very close to me. But when I started to think about how often I will be moving in my life time, and the thought of losing that card board box to water damage crossed my mind, I was mortified. I immediately started the hunt for a better box. I found an adorable treasure chest at Michael’s, and it just happened to be on sale. It’s durable and made of thick wood, so it will hold up much better than card board and I can keep it out on display. With my 40% coupon in hand, I got the originally $60 treasure box for next to nothing.

But if you’ve been following my blog, by now you know everything I own has to be personal to Zac and I. Other wise, why do I even have it? So here’s what I decided to do!

IMG_0726Supplies:

  • Keepsake Treasure Box
  • Black and White Photos
  • Mod Podge
  • Paint Brush

** You can find the boxes at Michael’s and Hobby Lobby. Be sure to use your coupons and watch for sales! They come in a range of sizes and colors. I have a lot of letters and we have a good 16 years of the Army Life ahead of us, so I got the largest size possible.

**For the photos, don’t bother printing them on glossy paper. Printing them from a home or office printer on copy paper will actually work better for this project. So save yourself the money and print at home, work, or school. The amount will depend on the size of your box. The bigger the box the more pictures you will need.

Directions:

  1. Wipe down the lid of your box. Make sure there is no dust.
  2. Cut out your pictures. You can cut the whole picture out or just the silhouettes of you and your significant other. I decided to do a mixture of both to assure that all of the space would be filled.
  3. Apply Mod Podge to the back of your photos and arrange them in the lid of your box. You have a bit of wiggle room since Mod Podge doesn’t dry right away. But be careful if you remove pictures that have Mod Podge on them, they will rip very easily.
  4. Once you have all the pictures arranged how you like and all the space is filled, apply another coat of Mod Podge. It may show up white, but it will dry clear. Be sure to spread it even.
  5. Leave the lid open to dry.
  6. I wrote our names and the dates we started dating, and the date we got married on the wood panel, but you don’t have to do that.
  7. Admire your work, Instagram it’s beauty and share it with the world!IMG_0732IMG_0733

I think it turned out pretty well! If I were to do it again, I would probably print my pictures off smaller so more would fit. But I still love it and I think Zac will too!

lyssa

Up Themed Anniversary Gift

IMG_0718I hold a special place in my heart for Disney movies, but the love story in the movie Up is especially beautiful to me. I am a sucker for a childhood sweetheart story. My husband and I met when we were kids. We went to the same day camp, almost every summer, for our whole childhood.

So on our first anniversary of dating, I decided to make his gift completely Up themed. I didn’t have this blog back then, so I don’t have pictures of the whole basket, or how I made things step-by-step. But I will do my best to explain what I did.

The first thing I made for his basket was Our Adventure Book:

In the movie, the character Ellie, writes the “Stuff she’s going to do” in her adventure book. She tapes in pictures and draws things in her book. So I tried to do something similar.

IMG_0719IMG_0721
Supplies:

     For the Outside:

  • a small, brown scrapbook
  • red paint
  • a picture of “Our Adventure Book”
  • Mod Podge
  • Xacto Knife
  • painters tape

      For the Inside:

  • notebook paper
  • masking tape
  • a pen
  • printed pictures of places you want to travel to

Directions:

    For the Outside:

  1. Tape a straight line down the left side of your scrapbook, front and back. Use a picture of Our Adventure Book as a reference. (I also painted the inside flaps of the books)
  2. Paint the left side red. It may take a couple of layers.
  3. Once the paint is dry, remove painters tape.
  4. Cut out the letters, globe, and rope accent from the picture of Our Adventure Book that you printed off.
  5. Place the rope accessory in the center of the red area you painted on the front of your book. Mod Podge it in place.
  6. Arrange letters and globe and Mod Podge them in place.
  7. Once dry, Mod Podge then entire book, front and back.

   For the Inside:

  1. I started by writing the story of how he asked me to be his girlfriend on the notebook paper. I ended the story by saying: “I have loved every second of this beautiful year and I can not even wait for all of the future adventures we will have together.” I wrote in a “childlike” style, to keep with the theme.
  2. I ripped the notebook paper edges roughly and used masking tape to hold it in place.
  3. Next I took the pictures of places Zac and I wanted to go together all over the world. I ripped the edges of them to make it look like I ” ripped them right out of the book!” just like Ellie did in the movie. Then I taped them in with masking tape and wrote the name of the place.
  4. I filled the book with all the places we want to go together.
  5. Then I went back and filled the extra space with doodles.

Back then, these adventures were very out of reach for us. But today, they are actually possible. So I have decided I am going to add more pages so I can tape in pictures of us visiting these places as well! We have visited Disney World and we are moving to Hawaii. So we are checking them off, one page at a time!


The second thing I added to his basket was Our Adventure Fund:

In the movie, they have a jar labeled “Paradise Falls” that they keep their change in. Something I have always done, is save my change. So this seemed like a logical thing to do with Zac.

IMG_0725

Supplies:

  • Change Jar
  • Notebook Paper
  • Masking Tape
  • Change

**I bought my change jar from Bed Bath and Beyond. It counts the change as you drop it in. You don’t have to buy this change jar.

Directions:

  1. Write “Adventure Fund” on the notebook paper, or anything else personal to you.
  2. Rip it out so it matches the Adventure Book.
  3. Tape it to the jar.

Through out the years, Zac and I have collected over $500 in change. This gift ended up being very practical for us. Since we haven’t sat down to roll the change, we are still collecting it. By the time one of us works up the patience to sit down and roll it all, we will have enough money for a really nice vacation.


Lastly, I put together his Up Themed Basket:

Supplies:

  • Basket
  • Adventure Book
  • Adventure Fund
  • Up on Dvd or BluRay
  • Candy
  • Photo in Frame
  • Balloons

Arrange all of the above together in a cute way. Give as a gift! Knock his socks off!

IMG_0717


Zac loved the adventure book, and we ate a lot of chocolate while we watched Up together.

I keep Our Adventure book in front of our DIY Travel Globe, on our dresser and they look GREAT together! Have fun with your Up themed gift, or use these Up themed Ideas for your wedding, party, or anything you could possibly think of!

**Note that all of these pictures were taken over two years and two moves after I made them. They are a little beat up, but they are still hanging in there!

lyssa

Batman Care Package

Everyone who knows my husband and I, knows how much we love Batman. So when a fellow army wife asked if I would have a “care package making day” with her, I knew I had to do something Batman related. I know I will make many, many more care packages in my life time, but I think this turned out pretty well for my first attempt.

IMG_0659Basic Supplies for Any Care Package:

  • Priority Mail Box
  • Card Stock
  • Letter Stickers
  • Decorative Stickers
  • Paper Cutter (not pictured)
  • Glue (not pictured)
  • Scissors (not pictured)

After a fun night of crafting, this is what I came up with. I stuck with black and yellow since Zac is in Ranger School. I think it worked out well. I know it’s going to make him laugh and I can’t wait to hear what he thinks of it. And I definitely can’t wait to make more!

lyssa

Open When Letters

IMG_0484“Open When Letters” are a pretty common thing on Pinterest these days. Everyone has their own take on them. If you haven’t heard of them, “Open When Letters” are letters written in bulk and given to someone all at one time so they can open them later. Each envelope is labeled with a different situation in which it should be opened. For example, an envelope could be labeled “Open When It’s Raining” or “Open When You’re Angry”.

People have been making “Open When Letters” for a wide range of reasons. I have seen them given as graduation gifts to high schoolers, as a going away presents from one friend to another, and something a couple holds onto in a long distance relationship. For as often as they pop up on Pinterest, I never thought I would ever actually want to make them.

Until my husband went to Ranger School.

I found a group of wives and girl friends whose significant other was also in Ranger School with Zac. Writing “Open When letters” was recommended to us. We were told that students would cling to them during their second phase so sending them back after their Darby Pass with letters in had would be helpful.

So I decided to give it a try. Here’s what I came up with.

IMG_0503Supplies:

  • Colorful Envelopes
  • Paper or Stationary
  • Markers or Colored Pencils/Pens
  • Access to Printing Pictures
  • Laminate sheets (optional)
  • Scissors

**I bought a blank stationary kit so everything would match. The paper was small, which worked for my situation because Zac wouldn’t always have a lot of time to read these when he needed them. I printed all of the pictures I needed at home from my printer. I also bought laminate sheets from target that didn’t require a machine. If your intended recipient isn’t going to be drudging through swamps, you probably don’t need to laminate your pictures.

Directions:

The possibilities for this are virtually endless, so don’t limit yourself to what I came up with. You can copy what I did completely or change it to fit your needs.

  1. First, you will want to come up with your list of “Open When’s”. Depending on what you decide to do, you may need more supplies. So it is good to establish what you are doing before you jump right in. These are the “Open When’s” I ended up with:
    • Open When…
      • Right Now
      • You Need a Good Laugh
      • You Can’t Sleep
      • You Want to Reminisce
      • You Need Some Support
      • You’re Missing Music
      • You Are Almost Finished
      • You Can See The Light At The End Of The Tunnel
      • You Miss Your Fur Babies
      • You Need A Smile
      • You Need to Hear How Much I Love You
      • You’re Wondering What I’m Up To
      • You Wish You Were Somewhere Else
      • You Have A Friend Who Is Struggling
      • You Want To Think About Our Future
      • You Have Impressed Yourself
      • You Had An Awesome Experience
      • You’re Missing Your Princess
      • You Need A Kiss
      • It’s Raining
      • You Just Want To Open One
      • You Are Angry
      • You Are A Happy Ranger
      • You Could Use A Pep Talk
      • When You Are Missing Your Friends
  2. Once you have established your list, you should start decorating the outside of your envelopes. I didn’t do anything elaborate, just a few embellishments around the edges.
  3. One-by-one, start writing the letters. Some of them should include more than just a letter. I included pictures with the letters to make it more personal. For the “Open When You Need A Kiss” envelope, I put on dark lip stick colors and kissed pieces of paper. After cutting each “kiss” out, I sprayed them with hairspray and added them to the envelope so they would fall out when he opened it.IMG_0483

Find your own creative ways to make each envelope special. If you are making your letters for your solider, don’t be afraid to do something cheesy. You’re corny little joke might be the only “funny” thing that happens that day. If you are making these for a friend or girlfriend/boyfriend, make sure to include personal touches where ever and when ever you can. I sprayed a lot of them with his favorite perfume of mine. Any little touch of home I could think of, I tried to use.

I can’t wait to give my stack of letters to my husband on his eight hour pass. I know it is going to brighten his day every time he gets to open one. Just knowing that I spent that much time on them will make him happy. Have fun with yours! There’s no wrong way to do them!

Update: I gave the letters to Zac and he was so excited to take them with him. He refused to pack them because he wanted to hold them. I can’t wait to hear what he thinks of them!

lyssa

DIY Rolodex Makeover

I know what a lot of you are thinking just from reading the title of this post.

“How does that 24 year old even know what a Rolodex is, let alone have one to make over?”

IMG_0488Well my friends, my mother is a hoarder. In the fall of 2014, I spent my time working along side my parents in the family business. We gave the back of their office a nice little face lift. But before we got to that point, I had to go through all of the crap that had been building up in that office for years. Between my mom’s need to save everything, and my grandpa’s thrift store/yard sale/auction purchases, there was a good amount of random stuff in that office. I found not one, not two, but THREE Rolodex’s. I talked her into letting me take one, and here we are.

That ugly Rolodex has been sitting on my crafting table since November when we moved in. It seemed to just stare at me and mock my lack of inspiration to do anything with it. But now that I am in the middle of a “crafting challenge”, it seemed like a fitting time to make this thing usable.

IMG_0487Supplies:

  • Rolodex
  • Rubbing Alcohol
  • Q-Tips
  • Paper Towels
  • Paint

Directions:

  1. Before starting anything, you should take all of the paper and dividers out.IMG_0489
  2. If your Rolodex was anything like mine, you are going to need to clean it. Rubbing Alcohol will take care of any dust. I used Q-tips for all the hard to reach places and paper towels for everything else.
  3. Once the Rolodex is clean, choose colors. I chose pink, purple, and silver. If you have craft paint, it is going to take a few solid layers. Keep applying layers until the color looks solid.IMG_0494
  4. I decided I didn’t just want a solid color. So i drew chevron on mine. If you want to you can tape it off to get the perfect chevron, but I just free handed mine.
  5. Lastly, I wrote our last name on the front plate where it used to say Rolodex.IMG_0500
  6. Now that you have it completely decorated, you can replace the letter dividers and paper.IMG_0502

I decided to use my Rolodex as the classic address book, but you could use yours as a recipe holder, or anything else you can think of. Now proudly show off your super old Rolodex!

lyssa

DIY Travel Globe

IMG_0481

Last week, I started a weekly craft challenge. This is my week two project.

My husband and I want to do a lot of traveling together. This time next year we will be living in Hawaii and who knows where his military career will take us. So I wanted to make something to show off all the cool places we have been and will go in the future. There are so many ideas on Pinterest. I have seen maps with pictures cut out in the shapes of the places they had been, needle point maps with states stitched in, and maps with pins marking their travels. Since we already have signs labeling the duty stations we will travel to, we didn’t want another thing to hang up. We decided to use a globe and paint in the places we go together.

Supplies:

  • Globe
  • Paint Markers
  • Paint
  • Paint Brushes

Directions:

  1. The first step is finding a globe. I looked for a few months before I found one I wanted to use. Depending on where you look, globes can be very expensive. I found mine at Target for around $20. It was the best price I could find. But I would check at your local thrift stores before making the trip to Target. You could get lucky and find a good one for a very good price. IMG_0471
  2. Once you find your globe, the next step is to paint in your globe. Unless you like the look of your globe, you will want to paint it. My globe has a gold base, so I used a gold paint marker to fill in all of the land. If you are concerned with getting every single detail correct, I would get a fine tip paint marker. The markers are easier to control and some of the islands are very small. IMG_0472
  3. The water on my globe is navy blue and I liked the way the navy and the gold went together so I decided I wanted the water to stay navy blue. But I needed to cover up all of the words and markings so the globe would be consistent. I chose the closest navy blue paint I could find. Keep in mind, painting a round object presents its own set of challenges. If you can find a paint marker in the color you decide to use, use it. If not, use a fine tip paint brush.IMG_0474
  4. Touch up any places that may need a second coat of paint.
  5. Once your whole globe has been painted, you need to pick a color that you will have easy access to for a long time. The whole point of this project is to document your travels throughout your life time, so don’t choose a color that is going to be hard to find down the road. I chose silver.
  6. Color in all of the places you have already been.IMG_0476
  7. As a final touch, I used a white paint marker and drew in our home state, Ohio. I also drew a gold heart and outlined it in black, on Cincinnati. You can do the same on your home state and city. IMG_0478

Have fun with your globe! Make it personal to your family and it will mean so much more to you! I am hoping we fill up our globe with paint and memories. I can’t wait to see all the places our travels take us.

lyssa

DIY Patriotic 4th of July Wreath

This past weekend, my husband left for Ranger School and I issued myself a challenge to keep myself from going completely insane. I decided that every week my husband spent in Ranger School, I would complete a project. It would give me something to do in my free time, instead of spending it worrying about my solider at all hours of the day.

Since 4th of July is right around the corner, this week I decided to make a patriotic wreath for our front door. Not only is it fitting for the season, but it’s something Zac would love to keep up throughout the year.

IMG_0424Supplies:

  • Medium Sized Wire Wreath Frame
  • 1 Roll of Burlap
  • Patriotic Fabric (approx. 1 yard)
  • 2 Small American Flags
  • Pipe Cleaners (I would use tan, but I had brown on hand)
  • Card Board Letter
  • Paint
  • Scissors
  • Hot Glue Gun/Glue

** Everything I bought for this project, I bought at JoAnn’s Fabric. JoAnn’s not only has daily coupons, but they will also match the best deal from any other craft store. I am lucky enough to have gotten to know the sweet woman who works the cashier at my local JoAnn’s and she always takes the time to find me the best deal. I already had the burlap, pipe cleaners, and paint. Pipe cleaners and paint have a pretty standard price no matter where you go, but burlap is significantly cheaper at WalMart.**

Directions:

  1. Start by attaching the end of the burlap to the wreath frame, using a small piece of pipe cleaner. Make sure you attach the pipe cleaners to the back. You aren’t going to want to be able to see them when you are finished.
  2. Then loop the burlap through, securing it with pipe cleaners every few inches.
  3. You’ll notice the wire frame is broken up into sections. I broke up those sections. I left the top and bottom sections, and the left center section open for fabric and filled the rest up with burlap. IMG_0425
  4. I chose two different fabrics and got 1/2 yard of each of them. But you could choose one yard of one fabric. Completely up to you. Either way, cut your fabric into strips that are roughly the same width as your burlap.
  5. Tie the fabric to the edges of the wreath.IMG_0426
  6. Loop it through, secure with a pipe cleaner, twist to (alternate colors), and loop again.IMG_0429
  7. Fill all the openings with the remaining fabric.IMG_0430
  8. Next, paint your card board letter to match the fabric you chose. (I had much more blue in my fabrics, so I painted the front of my letter red to balance it out. I painted the sides blue to tie it all together.)IMG_0436
  9. While your paint is drying, attach your flags to each other using pipe cleaners. (If you end up getting 99 cent flags, it may be a good idea to secure the flag to the stick it comes on using hot glue. The staples they use don’t always hold up for long.)
  10. Attach the the flags to the wreath using pipe cleaner. (I also added some hot glue to keep them in place)IMG_0435
  11. Finally, flip your card board letter over. Squirt a glob of hot glue on the top and bottom of your letter. While the glue is still hot, attach half of a pipe cleaner in the middle.IMG_0439
  12. Once dry, use the attached pipe cleaner to secure the letter to the wreath. I attached my letter and used it to block the pipe cleaners attaching the flags. I did my best to hide all of the unsightly pipe cleaners.IMG_0440
  13. Hang your master piece on your door and enjoy being the envy of the neighborhood 😉

Week One of my crafting challenge adventure is in the books! I think it turned out pretty cute! I can’t wait to see where week two takes me. I still haven’t quite decided what I am going to make, but I know I’ll have fun with it!

lyssa

My Pinterest

PintHello Bloggers, Readers, Crafters, Eaters, and Everyone In Between!

Did you know that Once Upon My Fairy Tale has a Pinterest!?

If you are interested in keeping up with everything OUMFT has to offer, click on over to My Pinterest Page and give us a follow!

lyssa

Name Canvas

This morning I had the pleasure of having Miss. Anna Kate over for a few hours. She loves arts & crafts just as much as I do, so as usual, we made something fancy. A couple weeks ago, we were scrolling through Pinterest together and we saw some paintings made using painters tape. She didn’t understand how it worked so today I picked a project to teach her. She had so much fun painting it! It is such a simple project for the little ones in your life.

IMG_1392Supplies:

  • Canvas or Canvas Board
  • Painters Tape
  • Paint
  • Old T-Shirt or Apron (not pictured)
  • **Be prepared with lots of paper towels.**

Instructions:

  1. Cover your table with paper towels or newspaper and get your little one in an old t-shirt or an apron. This is going to get really messy.
  2. Use the tape to write out the child’s name (or any other word you may want) on the canvas board.
  3. Have them push the tape down as hard as they can. Make sure it is flat to the canvas. You don’t want any paint sneaking under.
  4. Hand them a brush and let them go crazy. Try to make sure they aren’t getting the paint too watery if they are washing their brushes off. Anna Kate learned that watery paint can get under the tape.
  5. Let dry. About an hour. If you are under a time constraint you can cut down the time by turning on a fan or using a blow dryer.
  6. Peel off the tape. If watery paint made its way under the tape, it will come right off with a wet paper towel.

The possibilities for this project are endless. No matter how many times you or your little one make it, you will never make the same project twice. You can also try to use letter stickers or stencils to get a new feel to your painting. Have fun creating your own masterpiece!

lyssa

DIY Unity Canvas

My husband and I got married in August of 2014. We wanted a mix between a traditional wedding, and something as unique and different as we are. So when we reached the point of planning the unity portion of our ceremony, we spent days researching different ideas. Pinterest offered a lot of great inspiration, but we couldn’t find anything we liked. We knew we wanted something that we could keep for ever and display in our home. After days brain storming and walking through Hobby Lobby, I finally came up with a rough idea.

IMG_8117We bought three canvas letters to make our monogram. Our wedding colors were pink and navy blue, so Zac painted his “Z” navy and I painted my “A” pink. Then we took the large “C” and painted the left side blue and the right side pink. It took us a while to get them to blend in a way that we liked, but we eventually got them perfect. Then we bought two rectangular canvases. We wanted our parents and grandparents to be involved in the unity ceremony, so we decided to make a shape for all of them. Zac’s family shapes went on one canvas, and my shapes went on the other. We drew them in lightly with pencil. Then we picked a palette of four colors: pink, navy blue, purple and light blue. We figured out the best lay out of colors and assigned each family member a shape and a color. By figuring that out yourself before hand, you take away the guess work of what colors will be next to each other.

IMG (173)We told our family members not to worry about painting in the lines or being neat. How ever it ended up would show every person’s character in their shape. As each grandparent and parent made their entrance , they painted their shape and then sat down. Their were two shapes painted prior to the day of our wedding. Zac’s grandma passed earlier in the year so we had his grandpa paint her shape. And my grandpa was unable to leave the nursing home to be there with us, so we visited him prior to the big day and he painted his shape beautifully. Each painted canvas represented the people who made us who we are today.

IMG_1146When it came time for the unity part of our ceremony, Zac and I very carefully brought the two canvases together. This represented our two families becoming one. Then we took the canvas letter “C” we painted and placed it over top. (There was no way to hang the small letters, so we didn’t bother with them that day.) This was to symbolize us building our lives on the foundation our families had made for us. There were a few things we didn’t account for, like the navy blue and the purple looking almost the same next to each other. There was also the small issue with the “C”. We had put a nail in the board that the canvases were hung on where we wanted to hang the “C”, but we didn’t account for the space the canvases would take up. So when we tried to hang it, there wasn’t enough nail sticking out, so we had to sit it on top. It still looked beautiful.

10420400_10152422220542617_2100332800030430599_nAfter we got settled into our new apartment, I hot glued the two canvases together and then hot glued the canvas letters on top. They sort of blended in to the canvases in some spots so I painted a white boarder around each letter. Now our unity painting hangs in our living room, above our TV. It is a wonderful reminder of our commitment to each other and the best day of our lives and we get to look at it every day.
I am so glad we didn’t give up on coming up with a unique and new idea because this was one of the most talked about parts of our wedding. It is one of our most cherish possessions and it makes our living room look great!

Hopefully our Unity Canvas has inspired you to come up with a great unity idea, or to give our idea a try! Either way, good luck!

IMG_9927**Update: We finally put decided to put the money towards two canvases to compliment our Unity Canvas. We purchased canvas prints of us with each of our families to hang next to the Unity Canvas. We now have two photos of all the people who helped paint our beautiful master piece. I find it even more meaningful now, and it looks amazing.

lyssa